
All-grain ain’t the only way
Extract brewing gets a bad rap, but it can produce beers so tasty they can pass for all-grain, commercial creations
I recently did a segment for the FOX 5 Morning News featuring homebrew-supply outlets run by local brewing companies. One of them was the spot where many of San Diego’s amateur and professional brewers purchased their first homebrewing sets and initial ingredients, Home Brew Mart. Joining me on the segment was a brewer from that storied establishment, Jason Carlson, who talked shop (literally) and shared some of his specialty creations. After the segment, we got to talking and he shared with me that he regularly brews extract-based beers and taps them at Home Brew Mart’s tasting bar. I was flabbergasted. As someone who, like many, has been brought up to believe all-grain brewing is the only way, I had no idea utilizing malt extract could result in anything respectable or matching the quality of an all-grain ale or lager. But Carlson swears by it and, as a professional fermentationist he knows whereof he speaks. So, I invited him to speak publicly via our Voices of San Diego Beer series of guest articles so he could share how he gets the most out of extract and creates beers good enough to serve to a grateful public.
If it tastes good, it is good
by Jason Carlson
My adventure into the world of brewing started with extract. Why? Well, I don’t know. I guess it seemed like an easier way to get beer into bottles. I attended two beginner brewing classes at Home Brew Mart and ended up brewing three batches with extract before moving on to all-grain brewing. I was brewing twice a week, learning as much as I could, as fast as I could. I needed change. I had to get away from the salesman gig I had going on and reground myself. I needed to put my time and energy into something that made me happy, so I thought about it and it quickly became clear…beer! Well, beer and music (or music and beer). These are my creative outlets and I love them both.
It took a few months to go from zero knowledge of anything pertaining to beer, to working at Home Brew Mart. I now teach both the beginner and advanced brewing classes there, the very classes that taught me how to brew beer. What are the odds? Life is fun! It’s like a wheel, circling back around. Ka. I wonder how many of you readers will understand that reference. Anyway, I love my job, I love what I do, and I love the people I work with. And I also need another beer.
Ok, I’m back. I’m drinking a collaboration I did with Mike Howell at North Park’s Barley & Sword Brewing. It’s a winter spice ale called Yule Tidings and it’s pretty tasty.
So, getting back to extract brewing. Why would someone go that route? Because it takes less work and less time, little equipment is needed, you can do it in your kitchen and it tastes great! If you can boil water, you can make beer.
But doesn’t all-grain beer taste better? Well, in some cases it does, but in other cases it actually does not. The stigma surrounding extract may stem from the fact that it is the standard entry-level brewing method. The beer you feel is subpar may not have been due to the use of malt extract, but rather amateur brewing processes. I put extract beer on tap at Home Brew Mart and people not only drink it but come back for more. Why? Because if it tastes good, it is good.
Choosing & Adding Extract
There are two types: dried malt extract (DME) and liquid malt extract (LME). Both have gone through a mashing process and been dehydrated to a dried powder or a thick syrup. I prefer DME over LME because it’s easier to use. That said, I’ve had some pretty good homebrews brewed with LME. In the end, it’s all what works best for you.
When it comes to color, always choose the lightest one. Pilsen, Golden Light, something with a low SRM (Standard Reference Method pertaining to the color of a beer). Why go with a lower SRM? Because we are going to get our color, flavor, body and more fermentable sugars from our steeping grains.
When you add your extract is very important to how your beer will come out. Remember, the longer you boil your extract, the more it reduces and caramelizes. Your beer will come out maltier, and that in turn makes it harder for the yeast to eat the sugars. As a result, your beer will be sweet and malty. All we are looking to do is sanitize and dissolve the extract, which only takes a few minutes. I highly recommend adding your extract to the boil towards the end. It could be the last 15 minutes, 10 minutes or even 5 minutes. I’ve even done a flame-out addition with great success. I just don’t recommend letting your extract boil for longer than 15 minutes.
A great thing about this is now we can have shorter boils. If it only takes a few minutes to sanitize the extract, then why should I do a 60-minute boil? I started doing 30-minute boils and it’s been great. My brew day can be done within a couple of hours. I’ve even experimented with boils that last from 15 minutes down to 5 minutes, but I feel 30 minutes is a good sweet spot if you want a shorter boil. That way there’s still enough time to achieve hop bitterness while saving time.
From Grains to Glass
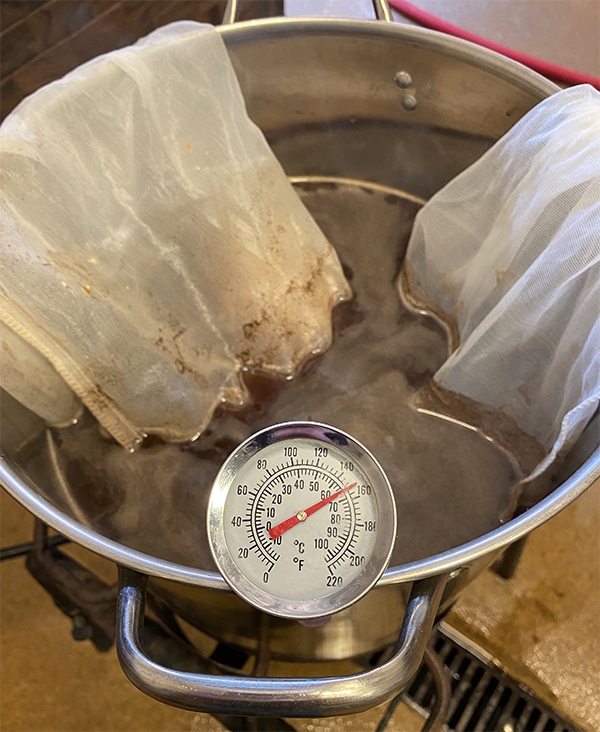
This is a crucial step to making a great extract beer. Adding crushed grains will give your beer more depth and character and this is where you get to be creative and mix grains. I always suggest putting a base malt like an American 2-Row or Maris Otter in the mix. I like adding in fermentables from my base grains. A long steep in a bag sitting at 150 degrees for 30-60 minutes will extract all that color and flavor while helping convert starches into fermentable sugars. This is usually called a partial mash.
Once this process is completed, drain the bag of grains but do not squeeze the bag. That will create astringency. Just let it drain into the kettle. Once drained, click on the boil and start adding your hops. Make sure you turn off the burner when adding your extract. You don’t want a boil-over. Also, don’t turn the timer off when adding the extract. Even though the burner is off, the wort is still over 170 degrees. That means the hops are still isomerizing and creating bitterness.
The extract should be mostly dissolved within a couple minutes. Once it’s 80% gone, turn on the burner and get back up to a boil, and continue stirring until it’s all dissolved. I like large kettles with a valve on the bottom. it gives me the opportunity to do a whirlpool and separate the solids from the liquid before transferring to the fermenter.
Speaking of fermenters, a good fermenter goes a long way. You’ll want a fermenter with lots of room. And you’ll want a fermenter with valves and or ports. The 30-liter (8 gallon) Speidel is perfect for 5-gallon homebrewing. It has a large valve and a large lid with a wide opening that makes it easier to clean. It’s more than enough room for 5-gallon batches. I always formulate my recipes for 6-gallon batches so that I can rack off a perfect 5 gallons into my keg. If you can, cold crash your fermenter for a few days before adding the beer to the keg. I like to put my clarifying agent in my keg so it mixes evenly as it fills, then let that sit and carbonate for a couple of days before serving.
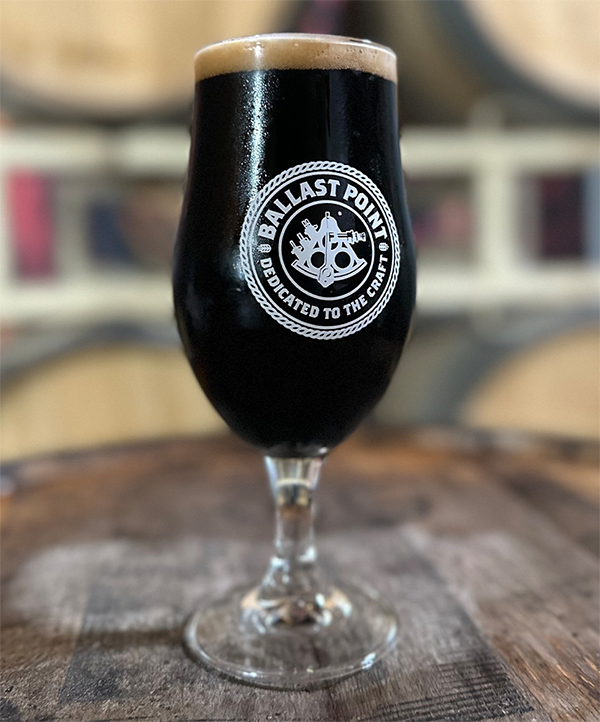
I’ve been brewing for a long time and I feel extract brewing gets a bad rap. When done right, it can taste great. Need proof? No problem! Here is a recipe for an extract beer I brewed for St. Patrick’s Day. It’s a dry Irish-style stout and it should be on tap at Home Brew Mart come March 17.
Dry Irish Stout
OG: 1.055
FG: 1.012
ABV: 5.7%
IBU: 36
Fermentables
- 4 lb. Golden Light Dried Malt Extract (DME)
- 1 lb. Corn Sugar (dextrose)
Steeping Grains
- 1½ lb. Flaked Barley (do not mill)
- 1½ lb. Maris Otter
- 1 lb. Black Barley
- ½ lb. Pale Chocolate
Hop Additions
- 60 min.: 2 oz EKG (5% AA¹)
- 10 min.: 2 oz EKG
Yeast
- WLP004: White Labs Irish Ale Yeast
Ideal fermentation temperature: 65-68F
Additives (Optional)
- Clarifier: 1 tsp Irish Moss or 1 tablet Whirlfloc
- Yeast Nutrient: ½ tsp White Labs (½ tsp/gal Biotin)
PREP
Measure out all ingredients:
- 3 gal. water in boil kettle.
- 3 -4 gal. sanitized, pre-chilled water in refrigerator
- All hop additions
Put pre-milled grain into steeping bag and tie the top of the bag in a knot.
STEEP
- Bring water in pot to 155° F, then turn off heat and add bag of steeping grains. This will bring the temp down to 150° F or so. Stir thoroughly to maximize exposure.
- Cover with lid to maintain 150° F for 30-60 minutes. Most pots retain heat pretty well with the heat off and the lid on.
- After 30-60 min., remove grain from pot and let drip dry over the pot. Do not squeeze or wring out the bag.
BOIL
- Turn heat back on.
- Once you achieve a stable, rolling boil, slowly add your 60-min. hop addition (watch for boil-over) and start your timer for 60 min. While boiling, sanitize any equipment that will come into contact with wort after the boil:
- Measure 5 gal. water and pour 1 oz (two capfuls) of Io-Star sanitizer into fermenter (mark the 5-gal. level on the outside of carboy) and let stand for 1 min.
- Use auto-siphon to rack sanitizer into a spare bucket or tub and use to sanitize rest of equipment: funnel, airlock, stopper and wine thief.
With 15 min left until the end of the boil, pause timer and turn flame off to halt the boil, then add malt extract. Be sure to pour slowly and stir constantly to ensure all extract (DME) dissolves completely. Once fully dissolved, turn heat back on. Watch for boil-overs again, as they become more likely the more extract is added.
- Have countermeasures for boil-over ready:
- Be prepared to turn heat down or off.
- Have a spray bottle of water ready to help keep foam at bay.
Once you’re back up to a stable boil, restart timer and start prepping ice bath.
At 0 min., turn off heat.
COOLDOWN
- Transfer hot kettle from burner to a sink or tub filled with cool water.
- Swirl pot to better cool the wort inside.
Using ice is more effective if you wait until the wort has cooled significantly before adding it. As the water becomes hot, refill your tub with cool water until the wort gets down to around 150° F. Getting from 150° F to 90° F with just cool water takes a while; this is where you want to add the ice.
- Once wort has cooled to 90° F or less, vigorously pour it into your sanitized fermenter. Top off fermenter to 5 gal. with the prepped 3 gal. of cold water. If the water you add isn’t completely cold, wait until wort is cooled down to 80° F or less before pouring it into carboy.
- Shake carboy for a few minutes to oxygenate and evenly mix water with wort. If you’re planning to take a hydrometer reading, do so here before you pitch the yeast.
PITCH
- Sanitize exterior of yeast package and use sanitized scissors to open.
- Add yeast to fermenter.
- Fill airlock to recommended line with sanitizing solution and fix in place with rubber stopper.
- Store in a cool dark place for the duration of the fermentation. You should witness bubbling activity in your airlock within 24 hours.